Tuesday, September 29, 2009

H-A-P-P-Y

Got part of the banner done today!

It is almost bedtime so excuse me for my succinctness.

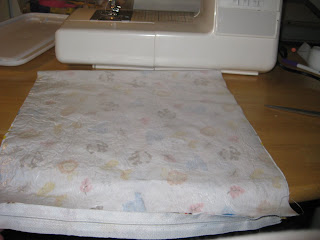
Ironing out all of the now-connected triangles. I had to trim them all to match one that was a bit short. Not as far off as I thought!
Re-watched Angry Chickens guide to applying bias binding without swearing. Twice! And believe it or not, no swearing was done. Out loud, anyway.
My first attempt...side one of the bias. Argh! Guess who forgot to lower the presser foot?
I don't even know what happened here but it was not good.
I meant to do "Birthday" first but look who pays no attention. So "Happy" it is! Turns out, this is going to take a lot more binding than I thought, so I have to go to Walmart this weekend to get more.
The finished product! I think it turned out pretty nice. Sure, it would be easier to go out and buy one, but it actually gave me an opportunity to test out a few of my new skills. Plus, it is for my little Munkin so whatever it takes, I will do.

Monday, September 28, 2009

More of the Neverending Banner

First triangle. I stitched these at 1/4" seam on the flowered print, not on the blue. The blue ones were all badly cut but the white was pretty good, so I used that as my guide.

Done chain-piecing one side of each triangle
Clipped those, chain-pieced the other side.
I used my pretty pink pinking shears and this was the result.
Turned them inside out, and voila! Almost done. Just have to apply the bias binding, cut these to uniform lengths, make another A, make one more flowered piece, and I am done! Let me also add "iron these flat without melting any letters" to the pile.

I finally got a bit done (lame, but done)

Yesterday I ironed and pinned the triangles for the banner.

Guess who didn't know that felt was a "melty" fabric? ME!
The others turned out fine, I just ironed them from the opposite side. I think I only got NEAR the A and this happened. Not even on it.
All pinned, nicely stacked. Turns out I am missing one flower triangle. These are pinned right side together and I will chain piece them tonight.
Bonus picture: A poor quality photo of the Podaegi I sewed in action. Still my favorite back carrier! Jack loves it because he gets to be hoisted on my back like Superman for this one!

Monday, September 21, 2009

Banner (Part 3)

I hand-sewed the letters on the fabric. Just a bit here and there, so I wouldn't have to pin it. I might reinforce this with the machine, or I might just leave it. Not sure.

Saturday, September 19, 2009

Wetbag: take 2

Today I did another wetbag. This time, I uses a patterned PUL so I didn't have to futz with an outside layer.
First, I used this PUL. It was a cute patterned one from when my mom made Jack a ton of cloth diapers with it.
There really wasn't a ton of it, and this was for a smallish wetbag. Here it is cut out and ready to go.
Oh no! The zipper is too long! Thankfully, the package for the zipper had directions on shortening it. I love the nylon zippers, they are very easy to work with. I just had to hand sew around the zipper where I wanted it to end, cut off 1/2 inch from there and voila! it was done.

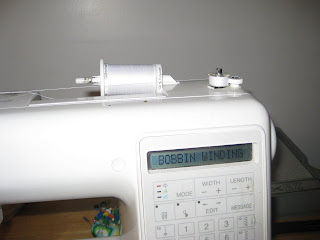
I had no pure white bobbin thread so I had to wind the bobbin. Anyone who has read for any amount of time knows I stink at winding the bobbin. I thought I figured out the problem but I was WRONG! I screwed it up twice before figuring out the real problem. It was tension, yes, but around the guide, not the spool. Fixed it and got it going.
The zipper is on. I am making another bag tomorrow (kitchen bag, same as yesterday only 1/2 the size). I will watch more tutorials on applying the zipper because I just did a crappy (though functional) job on this one too.
For some reason, the machine kept skipping HUGE chunks of stitches. It would have stitchstitchstitchloooooooooooongpieceofthreadstitchstitchstitch. Ugh. Frustrating. I eventually got it figured out, but it sucked.
Putting on the ring for hanging. This did not turn out anything like I hoped it would, but it works. I sewed it to the outside, and then put Aplix (velcro) on either side. Meh.
Here it is, hanging up on our over the toilet shelving thingy. I put the new microfiber rags I bought at Walmart today (cheap cheap cheap!) to see if it would hold the weight, it worked fine. Sure, they will be wet when they go in, but never soaking.
What did I learn today?

  • The sound of the machine is extremely important. I need to start listening to subtle changes in the "whirring" sound while sewing, because when it is screwed up, it makes a sound just a tiny bit different than "normal". It also feels a tad different. The bobbin and thread screwed up a few times and made a totally different noise as well.
  • PUL is easier to work with when it has a cute print, no messing with an outer fabric.
  • The ring to attach this to other stuff has not worked either time. This time at least the velcro holds it, but I am going to change it again tomorrow. Perhaps attach it in a way that it has to hang on something, can't be hung through something. We have plenty of clothespins to attach it to itself on a handle/bar anyway.

Friday, September 18, 2009

We interrupt this laborious banner making to bring you...

A kitchen wet bag! Here is the material I chose. Cute, eh? The strip at the top is to make the strap to hang it on to whatever it needs hanging on. I used the general idea of the BabyStuff wet bag.
Then we have the PUL. Mom had a whole lot more than I thought she did. She said "I have a little". A "little" to me is like, 1/2 a yard. This was far more than that. Slippery.
Most of my materials, cut after much rasslin' of the PUL. For those who don't know what PUL is, it is a waterproof fabric, used in cloth diapers and covers and many other items that need to keep moisture in. All my materials.Sewing the zipper on. I watched a Youtube tutorial on this. I got some good pointers, but in the interest of full disclosure, I kinda winged it. It actually turned out very well functionally. The zipper presser foot was a pain to get set right, but I figured it out.

I used the method of making bias tape that I used for making my apron. My iron cover still has the holes, so why not? This was to make the tie-on-thingy. I folded it in half and sewed a straight stitch down one side after ironing it. Nothing fancy. Sewed the strap into where the zipper connects. If I knew then what I know now, this would have been connected at the side instead of the top. Now the zipper is applied, I sewed up the sides. Here is a shot of my horrible, sloppy, icky, bad mad sewing skillz with a zig-zag stitch up the sides, double-stitching the bottom half of each side. The little square of blue fleece is to apply a drop or two of essential oil to. It is nice to be able to have a bit of a fresh smell in your wetbag. I think lemon would be lovely in the kitchen.
The finished product! It turned out pretty nicely, if I do say so myself. However, this will not be going into the kitchen. I went into the kitchen to give it a whirl, and it was WAY too big. Way. I put all our dirty rags in it (about 2/3 of our kitchen rags are dirty). They were in a plastic bag, don't worry. They took up very little room so I am going to try again this weekend. I will make one about 1/2 the size. I am going to Walmart tomorrow so I can pick up more stuff (like a zipper). I am also going to make one for the bathroom (yes, we use rags for cleaning the bathroom as well). That one will be velcro closure. Goodness knows we have enough PUL. This one will go in Jack's room instead. When our "main" wetbag is in the washer, we need somewhere to put the stuff, right?

What did I learn?
  • Zippers are tricky.
  • PUL is some slippery stuff, but it is very forgiving. I screwed up time after time but still never had to start over. Lots of trimming though.
  • Overall, this was an extremely easy project. It took a couple episodes of Judge Judy but almost all of that was while cutting the PUL and fabric to the same size. My cutting area is very small, so no easy time there.
Upcoming Projects:
  • Finish the birthday banner
  • Small bathroom wetbag
  • Small kitchen wetbag
  • Make a pair of fleece longies using this tutorial. Fleece longies are a pair of pants that double as a cloth diaper cover. We have a pair that is very very nice that I bought on Hyena Cart from a local WAHM/sister of a friend. I never once considered making any, but mom included a bit of really soft, nice fleece with the PUL so I figure hey, why not? Here it is. It is what was left after my mom made my grandmother the most horrible Snuggie-like pajamas for the Minnesota winter. Almost like footie pajamas for an adult, but no footies and no pants, like a dress. Guess what? She loves them and wants more. Not enough left of this one though :-)

Thursday, September 17, 2009

Banner Part 3

I finished cutting out the letters. It took a whole episode of Top Chef, but I got it done. This time I used a 250pt. font so I don't think I will trim the banner pieces too much.

Wednesday, September 16, 2009

Banner Part 2 (not going so well)

I didn't get much done but when your almost-1 year old is waking up at 3 a.m. for party time, small steps make you feel pretty accomplished!

Today, I printed out the letters for the banner. HAPY BIRTD. I figured I needed one of each letter, and I could cut them out of that. Well I started it, starting with the B.
I started cutting with the H though, it seemed easier.
It was actually kind of a pain in the butt that way.
I decided to cut a square of the letter, and a square of felt, this made it much more stable and easy to cut. So since I didn't print these from home, I have to re-print multiple letters tomorrow.
I did get HAI done though.
The font I used wasn't too big (I really thought it would be big enough) but instead of cutting bigger letters, I am going to cut about 3" off the top of each triangle. This should work fine.

Sunday, September 13, 2009

Got something done today, finally! (Banner Part 1)

Today I started making a "Happy Birthday" banner for my son's birthday next month. I used this sorta-tutorial. I like that it is a do this, you can mess around with that, etc. type of thing. I like to have choices.

We are not doing any real theme, but I love brown and blue, so brown and blue this banner will be. We are short on cash (yes, school started but a lot of catch-up is being played with the "big" bills), so I went to our Walmart, that mercifully still sells fabric, for my supplies.

I cut a piece of printer paper to 9" long, folding it in half. I used only the rotary cutter on this one.
Side 1. This is the side the letters will be on. I still have to pick a font (and make the time, this is going to be time consuming, as the tutorial writer mentioned).
I tried to cut this in a way that conserved as much fabric as possible, so I would have some good scrap left.
Happy Bir
The flip side. Yes, that is flowers. Yes, my child is a boy. This was the only thing that matched well enough to go with. It is for the flip side, anyway.
Both sides finished cutting out.
The brown stuff on the right is the felt I will be cutting the letters out of. I will choose the font, and probably cut the letters tomorrow. I will use interfacing in this, to make it a bit more stable. The tutorial I used didn't use it but I think for a novice like me, it will be helpful.
I took my own advice...instead of making my own bias binding, I bought my own. I didn't know to buy double or single fold bias tape. They had brown bias tape, single fold, for 50 cents so I got one of those and one of these double fold (at regular price, about $1.50). I will use the other one for something, I am sure.
Not related to the banner, but here are the supplies I got today for my kitchen wetbag. I like the fabric because it matches pretty much any fall or jewel toned kitchen items I might have, and the zipper is "natural" just because I didn't want black or white. Hopefully my mom will bring me the PUL on Friday so I can do this bag this coming weekend.